Kill Maze For Raiders
This proof-of-concept is a more complex example of Wiring. For other examples, see Wiring Examples. The purpose of this kill maze is to defend against Raiders.
How and why does it work[edit]
A killmaze takes advantage of the raiders' AI preference to not break any blocks, or if it has to, break Doors or Fence Gates to funnel them into an area filled with Traps to kill or at least severely damage the raiders before they enter your base. Having kill mazes around your base can help reduce or fully negate the damage your settlers will take in an event of a raid.
- Do note that if a path is too far or have too many doors or fence gates vs a single wall (such as 10 gates to break vs a 1-layer wall), the raider would sometimes choose to break in instead. Therefore, players will need to ensure separated mazes are not too far from one another (such as on two opposite corners or have four for every direction) and if using doors or fence gates to slow down raiders, ensure the wall is thick enough. (two walls thick should be enough to force raiders to use enter a kill maze with 4-5 gates, as of v0.25)
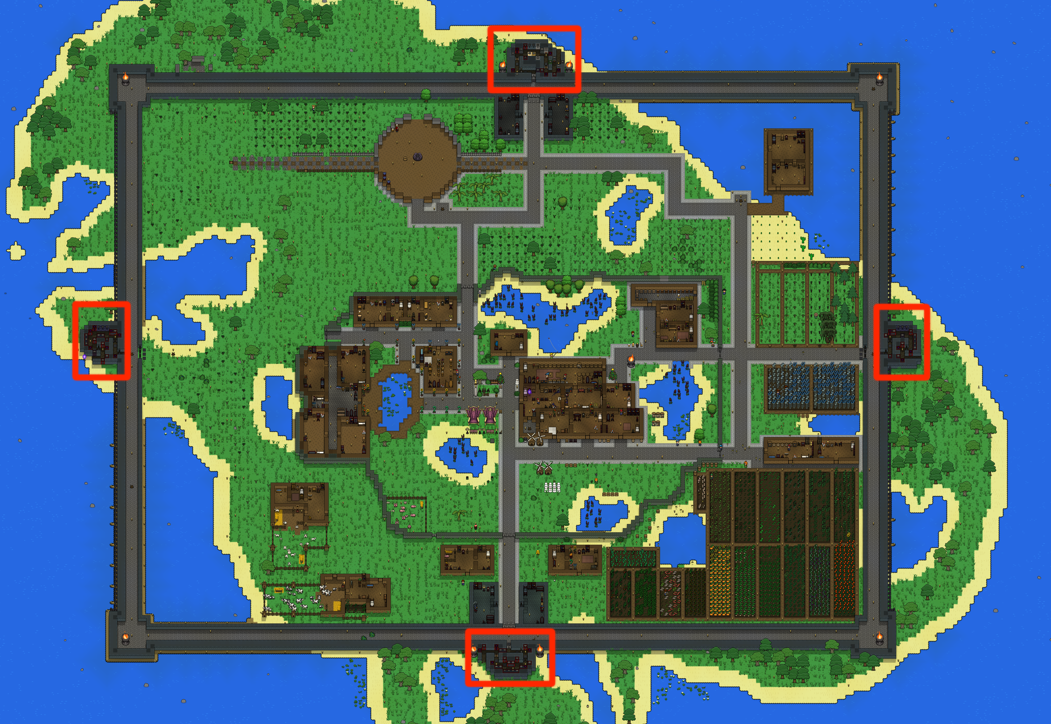
A kill maze will require a large wall surrounding your base and entrances meant for raiders to pass through.
Doors and gates can help with slowing down raiders, allowing you to build smaller and more compact kill mazes. However, when you have too many of them, a raider might find it faster to just break through the wall. The material and the choice between door or gate don't matter as they both have the same durability.
- It is also HIGHLY RECOMMENDED to exclude kill mazes from settlement defend zones so your settlers won't jump into the kill mazes when it is active.
Raider Pathfinding System[edit]
The system Necesse uses for pathfinding is a "Cost" system. The raider calculates the cost and compare them with other alternative routes, then takes the one with the lowest cost. A short summary of cost are as below:
| Tiles/Blocks | Cost to pass |
|---|---|
| Empty Tiles | 1 |
| Doors/Fences | 40 |
| Walls | 250 |
| Lava Tiles | 1000 |
A raider will prefer walking an extra 249 tiles to reach its destination over breaking a wall, while if given a choice of pathing through one block of lava or breaking through 4 walls, they won't have a preference (and some might be breaking the wall while others walking through the lava until the first wall breaks where it'll become 3 walls vs a tile of lava).
The cost of breaking down doors is fixed at 40, and for other objects it is objectHealth * 2.5f (by default, health is 100, and for furniture it is 50. Wall health is not specified, so the default value is used). The cost of moving across liquid surfaces is 1/mob.getSwimSpeed, twice as much for quicksand, and 1000 for lava/acid(SlimeLiquid).
Also note that the system is somewhat inaccurate when finding paths between regions (the map is now divided into regions, and only pathfinding within a single region is reliable). As a result, for large bases enclosed by walls, raiders prefer not to choose the shortest path, but instead go to points directly up/down/left/right from the flag and try from there. Thus, the kill mazes at the corners of large bases are often ignored, even if the raiders spawn right at the entrance.
Settlement Wall[edit]
To stop raiders from entering from multiple directions, a wall surrounding the whole settlement is required.
- The kill maze is the only opening in the settlement wall, so no matter what direction raiders or NPCs come from, they should be able to make their way to the kill maze and navigate it to enter and leave the settlement.
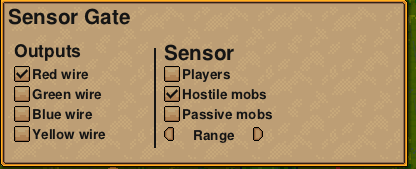
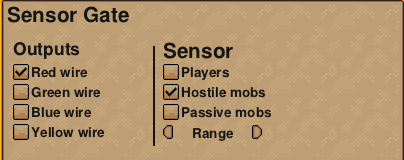
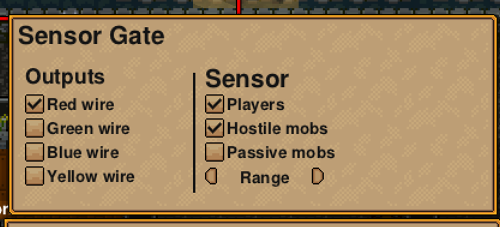
- To prevent kill mazes from hurting the settlers and the player, Sensors should be used and set to detect hostile enemies.
The required thickness of the wall depends on the number of doors/gates you are planning to place into your kill maze, as well as the size of your wall (affecting how far raiders from each of 8 directions have to walk to reach the kill maze).
- 1 thick wall is generally enough for kill mazes with 0-2 gates/doors
- 2 thick wall is generally enough for kill mazes with up to 5-6 gates/doors.
Kill Maze[edit]
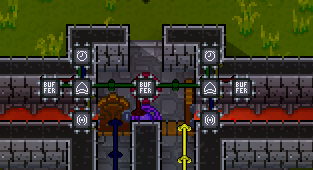
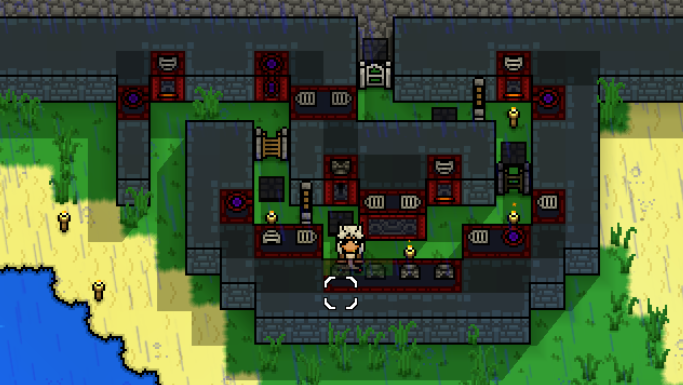
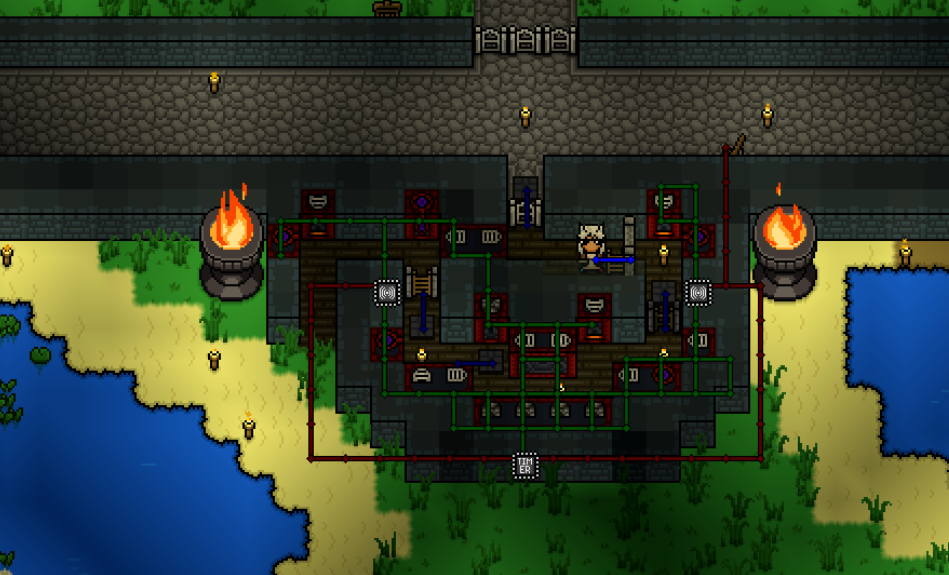
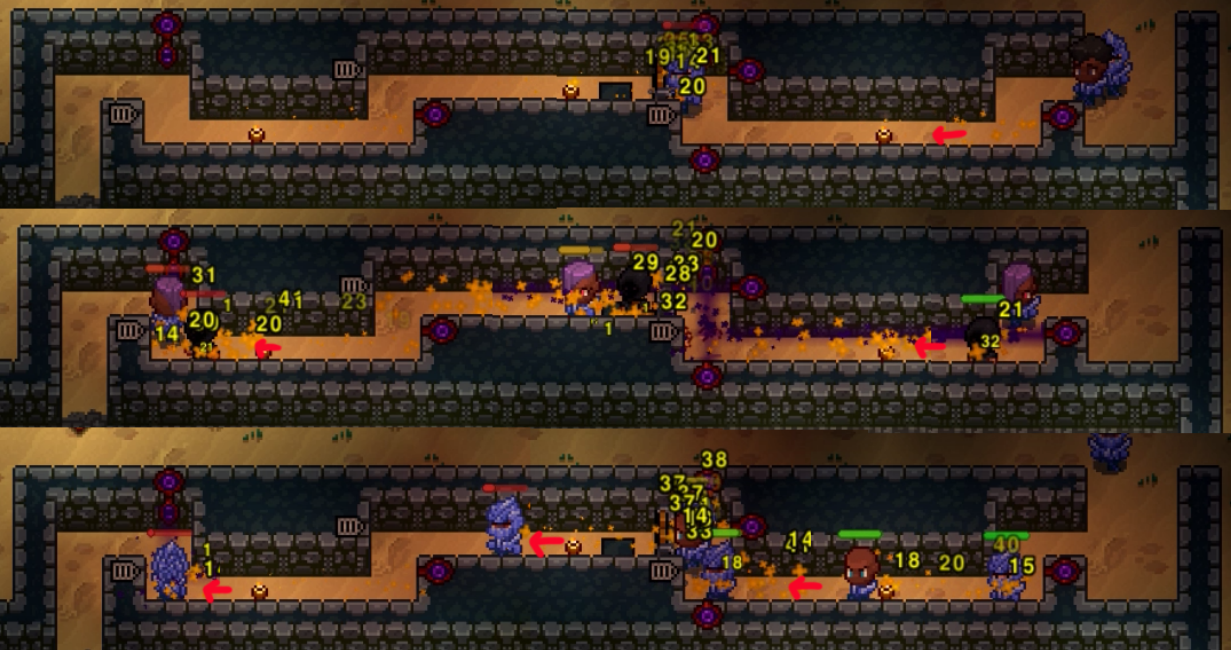
Here is a close-up of the kill maze on the south side. Raiders will be coming in from the bottom/South.
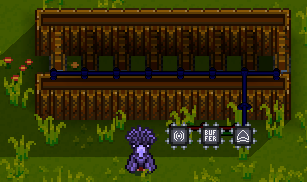
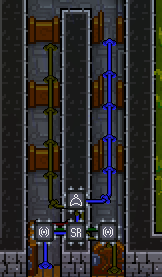
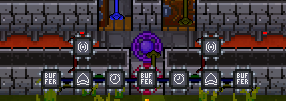
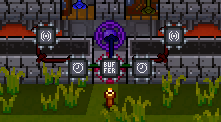
And here is the wiring setup used.
There are 2 corridors, each has a door and 3 fence gates. There's also a fence gate at the end where they both meet There's a bounce glyph and a reverse damage glyph at the entrance to make the raiders take more damage and bounce them over the lava.
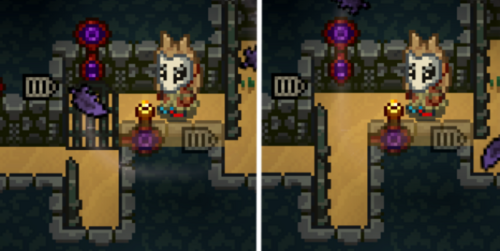
The idea is that the raiders will see the corridor with 1 closed door and 3 open fence gates as shorter than the corridor with 1 open door and 3 closed fence gates. So they will try to knock down the door. When they get past the door, the wiring closes anything that was open and opens anything that was closed and the raiders swap corridors. They will spend most of their time in the small kill box before the doors where traps can be placed. These can be arrow, flame and void traps earlygame or bounce glyphs, reverse damage glyphs and lava later.
Earlygame, a killbox using arrow traps, flame traps or void traps is fine due to the low hp and low number of raiders. Endgame, lava is more efficient since it deals damage based on the max health instead of a constant amount. This means it will take 6-8 seconds to kill a raider depending on if they are affected by the reverse damage trap. they also have no control due to the bounce glyph for 4 seconds. This leaves 2-4 seconds of control for raiders to leave the lava or break down a wall which takes 10 seconds. The lava sections should be about 30 tiles long at least to stop raiders bouncing off the end and returning to the path.
The design works for south, east and west directions. North facing traps need the doors moved up 1 tile since the raiders can get lower and potentially avoid being bounced into lava. This also requires a different wiring layout for the bounce traps in order to avoid wires unintentionally connecting.
Wiring Mechanisms[edit]
Everything needs a form of activation. Whether it be a lever, pressure plate or a sensor is up to the player. Levers and pressure plates will activate all the wires beneath them. For a sensor, which color wire(s) it activates for its output, what it detects and even its range can be dictated by the player. Doing so allows the sensor to activate when either a player, hostile mob(s), passive mob(s) or all of the above are detected nearby.
Doors and gates are opened when wired properly and activated and closed when deactivated. To be clear, to make sure a door is closed, it needs to be opened and closed again. This can be done by activating and deactivating a door. Pro tip: Interior doors and gates can be left open by default to reduce the noise generated by settlers continuously entering and exiting doors but programmed to close whenever raiders are nearby via a sensor and a "NOR" gate.
Doors and gates that should generally be closed but are not required to always be closed can be pulsed to close when raiders enter and leave the nearby area. This can be done with sensors powering an XOR gate with a buffer or delay gate also going into the XOR to deactivate it. Clocks can also be used to regularly pulse a door or gate. This, however, briefly opens it and allows raiders to pass.
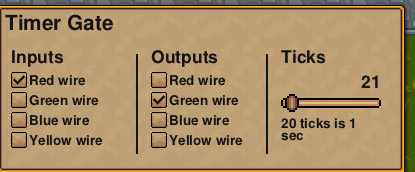
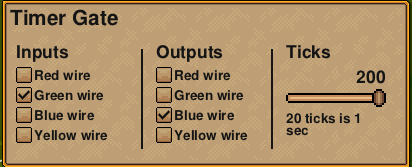
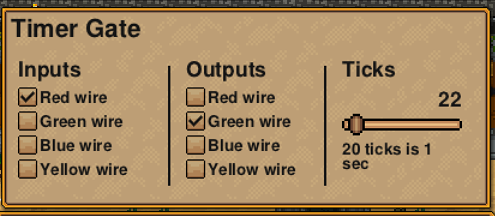
Arrow traps, flame traps and void traps shoot whenever they are powered. They have a 20 tick cooldown. This means they can be powered every 20 ticks. Due to a timing issue in the game, they sometimes don't fire. Powering the traps every 21 ticks avoids this problem. A timer gate can be configured to output a pulse every 21 ticks when it is powered. So it will turn on and off very quickly. Every time it pulses, it will power the traps.
Glyph traps have a 200 tick, (10 seconds), cooldown. They also can have timing issues meaning 201 tick cycles are required for reliable timing. 201-400 tick, (10 to 20 seconds), clocks can be made with a sensor powering an XOR Gate for a timer. Then that powers the output and a buffer to deactivate the XOR Gate. The timer and delay on the buffer add up to the total cycle time between each pulse. Even though glyph traps can be activated without any wiring, disabling the glyphs and using wiring allows for more control with timing to get more raiders with a single glyph and prevent raiders setting off multiple glyphs early and allowing other raiders to get past safely.
Wiring the kill maze[edit]
The wiring is split into 3 separate parts
- The latching doors - This swaps which doors are open changing the cost to travel both corridors. One will have 3 fence gates, the other will have a single door, the raiders AI updates and move to the shorter path. This swaps each time the raiders get past a door.
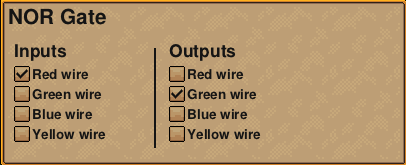
The left sensor with a range of 1 powers the red wire. The right sensor with a range of 1 powers the green wire. These go into a SR latch as inputs. This is a type of memory gate. If it is set/activated with the red wire, it will turn on and power the blue output wire. If the red wire is turn off, it will still power the output until it is reset with the green sensor. The blue wire powers the door on the red sensor side and the 3 fence gates on the other side. It also powers a nor gate which inverts the signal for yellow. So when blue is on, yellow is off. When blue is off, yellow is on. Yellow is a mirror image of blue and powers the door on the green sensor side and the 3 fence gates on the other side. Both sensors are placed behind the doors with a range of 1 so they activate only when the raiders pass the door.
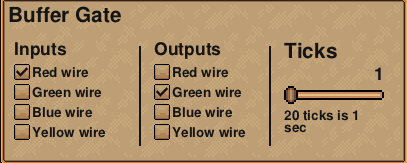
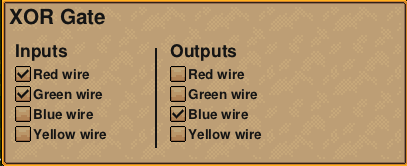
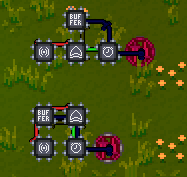
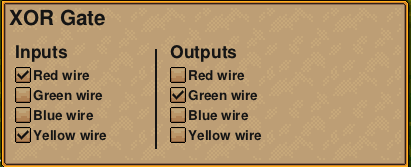
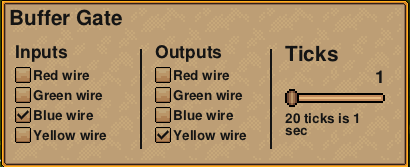
- The reset system is used to reset the doors and gates that may be in the wrong state causing the system to fail for example if some gates are opened by players. There is a sensor to detect hostile mobs nearby at max range. It powers a blue line. That powers a NOR gate to close the last gate. It also is the input to an XOR and a buffer. The buffer has a delay of 1 and outputs on yellow into the XOR. The XOR gate has blue and yellow inputs and red and green output. The blue sensor will turn it on. The yellow buffer 1 tick later will turn it off. This pulses the SR latch to set and reset all its doors and fence gates
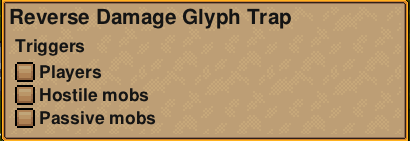
- The Trap wiring is used to damage the raiders by using a bounce glyph and sending them over lava. It is timed to activate before the door opens to catch as many raiders as possible. It uses a sensor with a range of 1 to power a timer is set to 176 ticks has a green input and outputs on blue. It powers the reverse damage glyph and a 4 tick buffer to power the bounce glyph with yellow wiring. This 4 tick delay is to make sure both buffs are applied to the raiders. The timer also powers a 25 tick buffer to make the full 201 tick cycle. As mentioned earlier, the north side will need to a slightly different layout because of the door positioning. Because the raiders change sides each time, a simple 176 timer without XOR or buffers can often work since the raiders will leave the sensor range. The sensors are placed over the first lava tile with a range of 1 to make sure they only activate when the raiders are in front of the door.
Legacy Kill Maze[edit]
Currently Endgame Raiders can have up to 5,860 HP making kill mazes that use void and flame traps as their primary source of damage less effective. They still have benefits such as no items being lost to lava and work before reaching incursions. They also provide time to defend and weaken any raiders that survive.
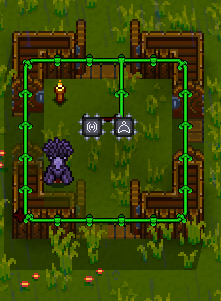
Here is a close-up of the kill maze on the south side. Raiders will be coming in from the bottom/South.
And here is the wiring setup used.
Note that there are 5 Fence Gates, 5 Pressure Plates, and a two wide wall behind it.
Wiring Explanation
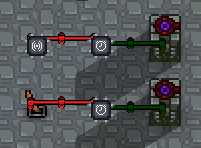
- The red Wire is the source of power for starting the kill maze. The Sensors will power it then the wire powers the Timer.
- In the example, it is also connected to a Lever. This is just to test if the traps work.
- The green wire is the output of the timer and it's the one that triggers the traps.
- The blue wire connects the gates and pressure plates (optional).
- The reason for this is so the gates will auto-close again after a raider breaks through the gate, activate the pressure plate (and "actively powers the opening of the gates"), and walks away allowing the pressure plate to deactivate and close the gates.
- This allows for a more consistent multi-wave raider clearing as well as making everything full automatic where the player does not need to manually close to gates at all after a raid.
Doors and Gates in a kill maze[edit]
Doors and gates are amazing for slowing down raiders, keeping them inside for longer while their health gets chipped away. This allows for a much more compact design than a "distance-only" based kill maze.
Doors vs Gates[edit]
With good design, a single Door can block a raider's path not only once but twice, slowing them down twice.
However, Fence Gates have the ability to allow the flame trap's AOE to pass through. (Not to mention that gates are centered on the blocks so it looks nicer than a door)
Ultimately, both are good choices but the right choice depends on your maze's design. Both doors and gates have the same durability so the choice entirely depends on if the player wants to make full use of flame traps or by making an even more compact maze with doors.
Traps[edit]
- Void traps deal high damage but is unable to pierce through gates. Therefore, it is placed before gates in the example so raiders get damaged while spending time breaking through the gates.
- Flame traps are weaker in damage, but deals damage-over-time after hit as well as have the ability to go through gates. This is why they are placed after the gates so the whole corridor is covered by the flame trap.
- Bounce glyph traps don't deal damage but they send mobs in a 1 tile radius away from it and apply the bouncy buff for 4 seconds making mobs bounce off objects they collide with.
- Reverse damage glyphs traps increase the damage given and taken by 25% damage buff for 15 seconds
- Chicken glyph traps transform mobs into a chicken for 15 seconds where they can't use tools. It will also randomise mobs movement while players still have control
Glyph traps can be right clicked and configured to detect certain mobs similar to the sensors gates. Other methods of dealing damage (arrow traps, thorns) are less used as they are not able to deal damage to more than 1 enemy. Thorns are also broken by any other trap's projectiles.
Wiring Settings[edit]
- Ensure that the output of sensors is connected to the input for timers and NOT connected to any traps.
- Ensure only the output of the timer is connected to any traps to allow the traps to be continuously triggered.
- Sensors should be set to detect only hostile mobs to prevent settlers and the player from getting damaged when passing through.
Making extra entrances for easier movement[edit]
If you would like to make extra entrances so you don't have to walk through the maze, you can do it by adding more doors/gates to said entrance relative to the number in the kill maze (ie, 6-8 doors if your kill maze has 4-5 doors), making it "harder to break through" for raiders, which means the raiders would prefer entering the kill maze. An example is a straight row of doors right next to the entrance.
You can also try ladders, placing one inside the wall and one outside. As raiders (and settlers) are unable to use ladders, this will be a player-only entrance method.
However, as you progress through the game you might start making use of Homestones and Waystones more, usually omitting the need for extra entrances.
Legacy How to build a kill maze[edit]
A kill maze is very simple and the design is extremely flexible. For this building guide, I'll be using a much simpler design and players may experiment with their own designs.
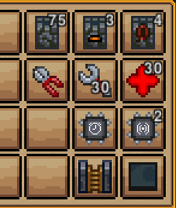
Before we start, we have to prepare the material. A simple kill maze will require building blocks (Dungeon Walls used in the example), traps, as well as wiring items (Cutter, Wrench, Wires, Timer Gate and Sensor Gates). Optionally, Doors or Fence Gates can be used for slowing down raiders. The exact number needed depends on the size of your kill maze.
Initial Design[edit]
The first step is to Plan the Path and Trap Placements. There are some things to keep in mind at this step
Initial Design before thinking of where to put doors or traps. Entrance to the kill maze is top right, while the exit / entrance to my settlement is bottom left Next comes the Timer Gates and Sensor Gates. Wire your sensor gates to your timer gates. Ensure that none of the wire powers any traps.
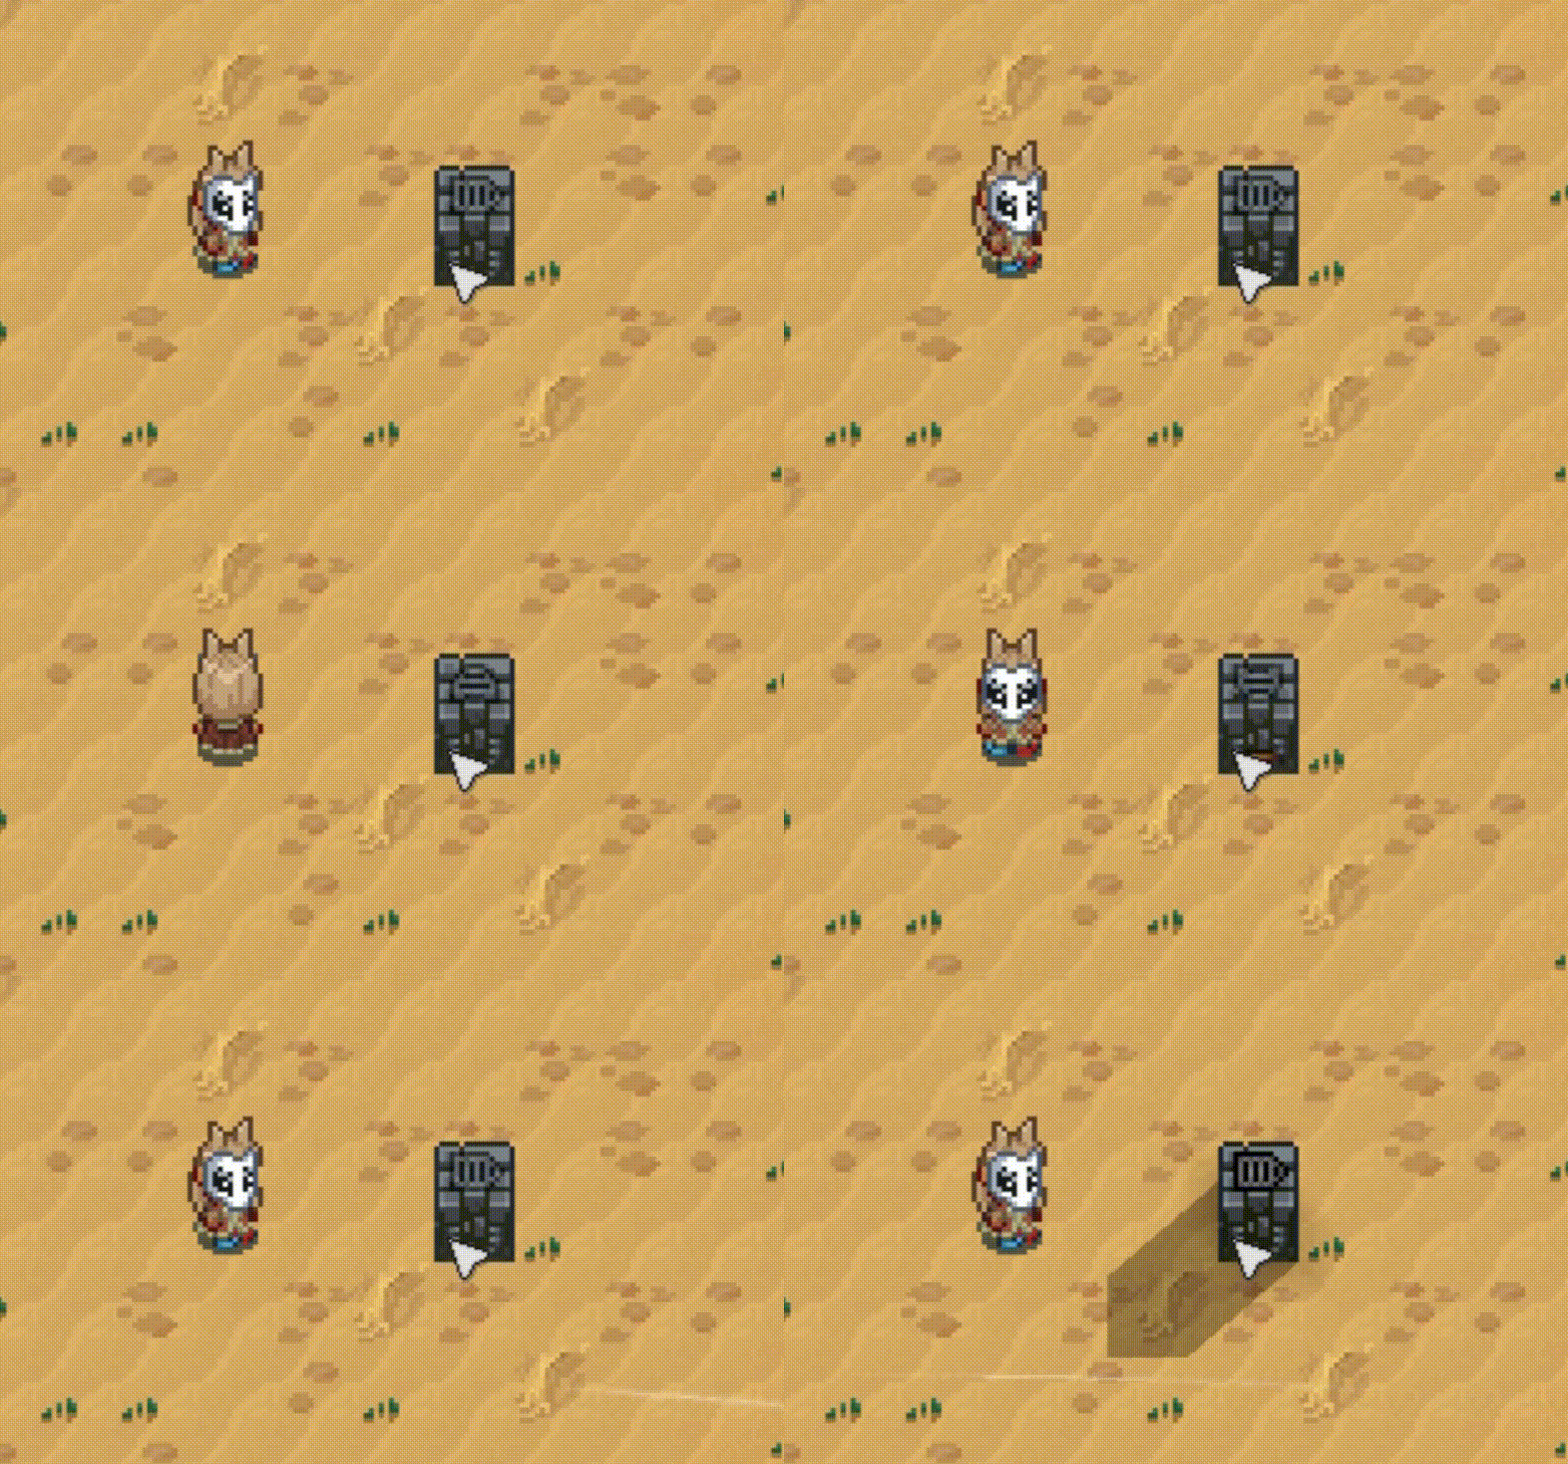
[I think this got updated recently and is now adjustable, up to a max of 15] To ensure that everything in your kill maze can be detected by the sensor, you can enable detecting players, connecting to to some wires, and check if which blocks that the sensor can sense the player from. 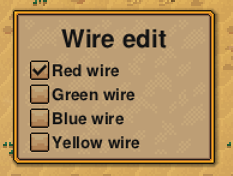 After testing the sensor's range, turn off the player detection and hook up a wire of a different color from the timer to the traps. And finally, set up your timer. Now, your initial kill maze is basically done. It is time to test it against real raiders. The health of the raider as it goes through the maze with this initial design |
Upgrading[edit]
Now for the optional bit, putting in Fence Gates and Doors. With one single gate, it's a pretty big difference. Some can't even get through the gate. With a one wide wall around my settlement, I can place at least two gates or door. |
 Two sided kill maze that fits in better with the build. Comes with an "easy access route" too in the middle. Contains a door and a gate
Tips[edit]
Collecting Traps[edit]
You can explore dungeons while holding a wiring item to make wires appear on both the map and your screen. Then, doing a mapshot (in-game map screenshot, or with /mapshot for the whole map) will show the location on the saved map too.
Testing Kill mazes[edit]
To know if your kill maze works, you have to check two things,
- If raiders will enter your kill maze instead of breaking through the wall
- The effectiveness of the kill maze (how much damage it can deal)
Waiting for a raid to occur can take a while. What you can do is make a copy/backup of the world, enter the copy (with another character or set the world to disallow outside characters), and do /startraid twice. The first time will ask for your confirmation to enable cheats. (Characters used in cheat enabled worlds will have achievements disabled)
Note[edit]
The design of the kill maze does not need to match what was shown in the example. In fact, all four kill mazes in the large mapshot example are slightly different.
All types of doors, gates, and blocks have the same durability (time required for raiders to open/break), which means the materials of your doors/gates/walls don't matter.
This page was recently fully revamped. The previous author went into more details on the step-by-steps for kill maze building. If you are curious about it, you can check it out by clicking into the page histories.
- View history [top right nearby the search button]
- Click on any of the [time, date] buttons before 11:03, 5 July 2024 by Rainfury. I recommend 04:19, 23 May 2023 by a unregistered user
